The TL;DR Version
- The Grind: Stop wasting 20 minutes per post on design.
- The Fix: An n8n workflow that scrapes your URL, interprets your content and generates usable images.
- The Special Sauce: It automatically slaps on your logo, a brand-colored border, and the title.
- The Loot: You get a high-res header and a perfectly cropped 1200x630 OG image for social media.
Look, let’s be real for a second. Manually cranking out header images is a total soul-crushing slog. You finish a 2,000-word deep dive, you’re exhausted, and then you realize you still need a LinkedIn-ready OG image and a catchy header. It is the ultimate "last mile" problem of content creation. Most people just grab a generic Unsplash photo or let some half-baked WordPress plugin spit out a pixelated mess. But we can do better than that.
I have been messing around with a "set and forget" pipeline that actually works. It is not just some AI prompt-to-image gimmick; it is a full-on Branding Engine built inside n8n.
The "Why" (Because your time is worth more than Canva clicks)
The "integrated platform" approach, you know, those fancy plugins that promise the world, usually leaves you with zero creative control and a hefty monthly bill. This n8n workflow? It is your secret sauce. It reads your article, figures out what you are actually talking about, and then commissions a custom piece of art that looks like it cost fifty bucks on Fiverr. Perhaps you have tried other tools, but they often lack the personal touch required for a professional brand.
What You Will Need (The boring but necessary bits)
Before you start playing God with AI art, you have got to get your house in order. If you are running n8n via Docker, and let's face it, you probably should be, make sure your volume mapping is not broken. You need a place to stash these files. I have seen too many setups fail because someone forgot a simple colon in their compose file.
The Essentials:
n8n instance: Running locally or in the cloud.
FAL AI Key: This is the heavy hitter for the actual image generation.
OpenAI Creds: For the LLM that "reads" your article.
The Assets: A transparent logo and a "frame" overlay (I call mine overlay4.png).
Pro Tip: Don't forget the fonts. If n8n cannot find your.ttffile, the whole thing will crash harder than a bad Windows update. I useVerdana_Bold.ttfbecause it is bulletproof.
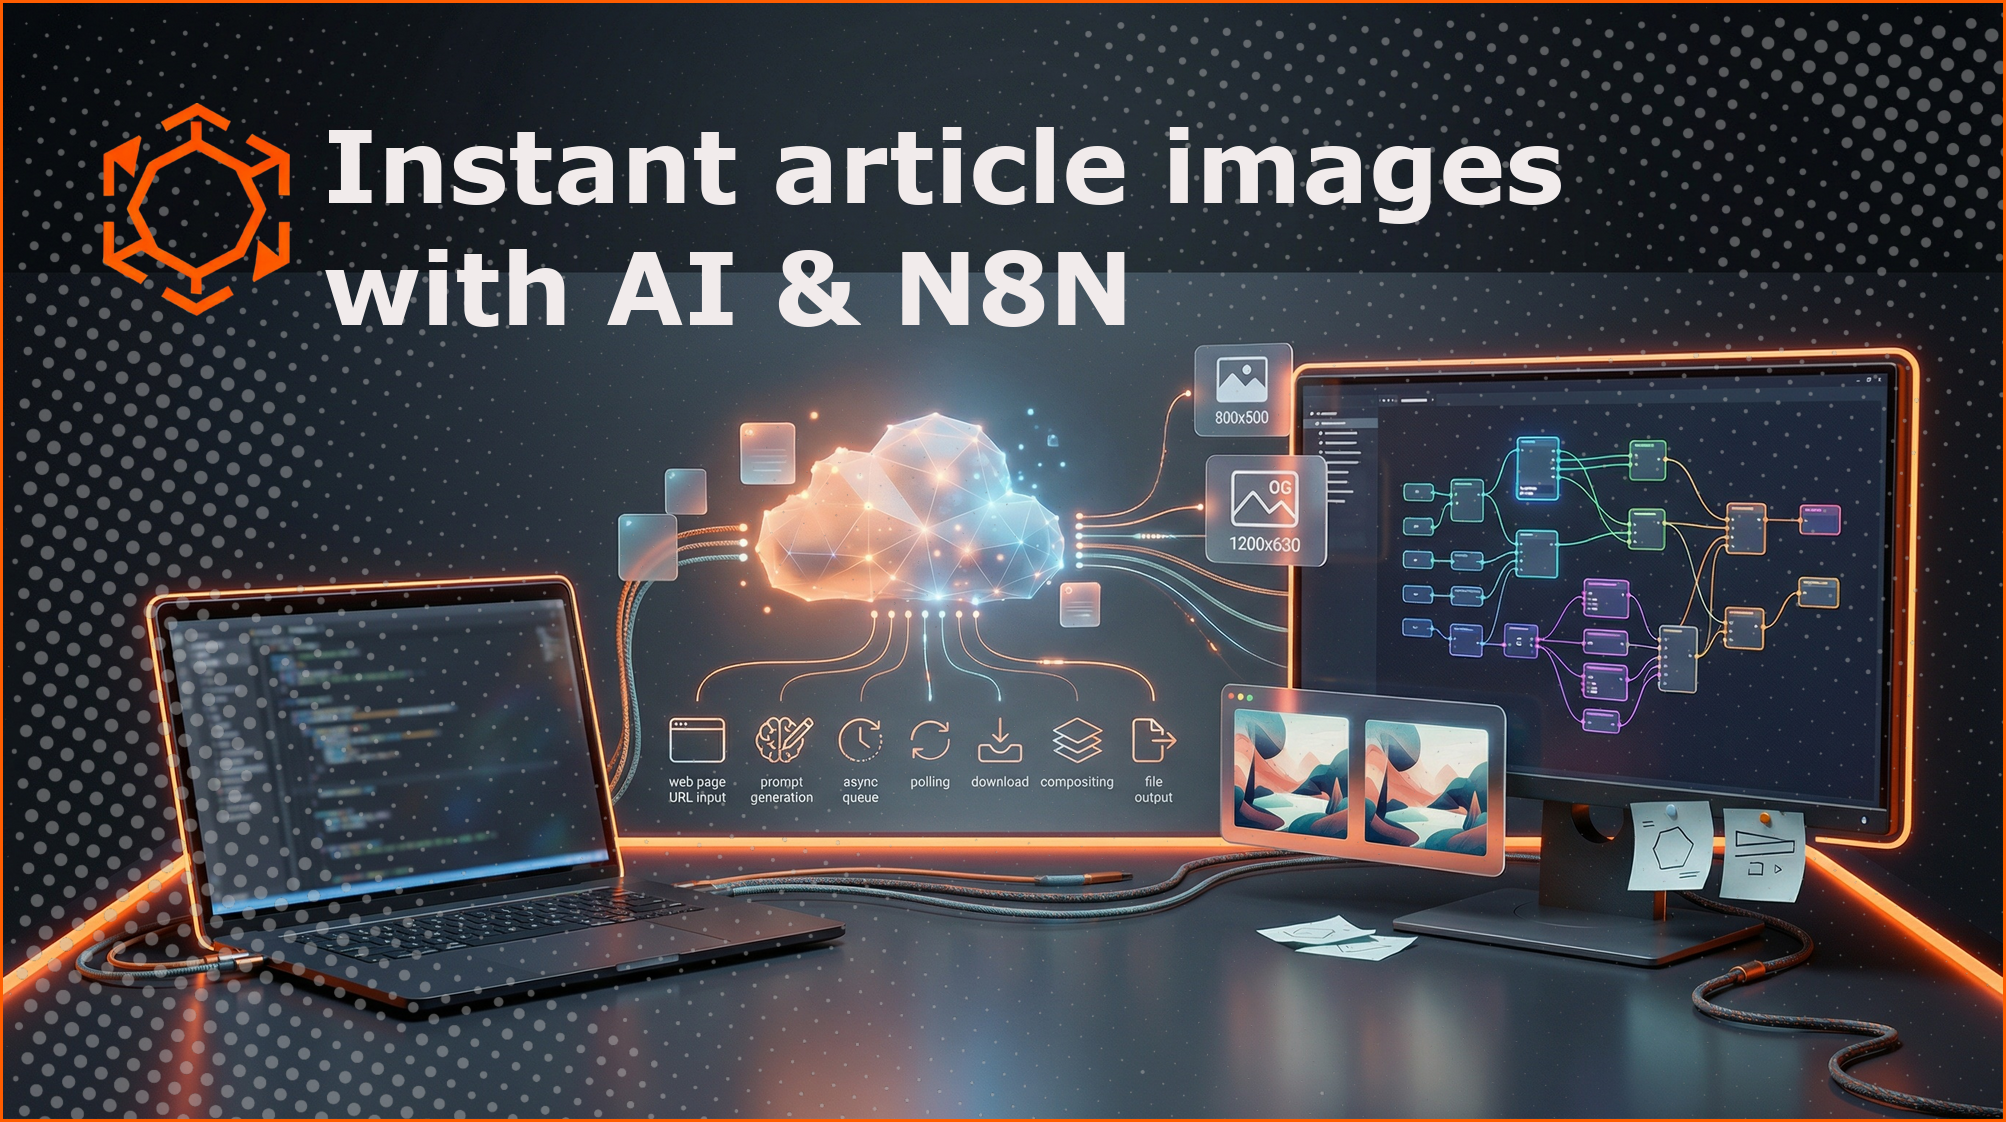
How the Magic Happens: The Step-by-Step Build
1. The Brain Scan (Trigger and Scraper)
Every journey starts with a URL. You begin with a Manual Trigger for your testing phase, but eventually, you will swap this for a Webhook. Connect this to a Set Node where you define your variables like article_link and brand_color.
Next, you need to "read" the post. Use the HTTP Request Node or an AI Agent equipped with a web scraper. The goal here is simple. You want the text content. Once you have the body text, send it to a LangChain OpenAi Chat Model. Tell the AI to act as a world-class creative director. It should summarize the article and output a single, punchy image prompt. We are talking about "cinematic lighting, cybernetic aesthetics, minimalist vibes," all the works. It seems like overkill, but the quality difference is massive.
2. The Artist (FAL AI Integration)
Now you take that prompt and send it to FAL AI. We use the "Queue" endpoint because high-quality art takes a few seconds to "cook," and n8n hates waiting for slow responses.
- Endpoint:
https://queue.fal.run/fal-ai/flux/schnell(or your preferred model). - Method: POST.
- Payload: Pass the prompt you generated in Step 1.
3. The Waiting Game (The Polling Loop)
This is where most beginners mess up. You cannot just ask for the image and expect it instantly. You need a loop.
Wait Node: Set it to 5 seconds.
HTTP Request: Check the status_url from FAL.
IF Node: Check if the status is "COMPLETED."
The Loop: If it is not ready, route the "False" output back to the Wait node. If it is ready, move to the "True" output.
4. The Digital "Sandwich" (Compositing)
Once the image is ready, the Edit Image Node goes to work. This is the part I love. It layers everything together:
- Bottom layer: The AI-generated masterpiece, resized to $1920 \times 1080$.
- Middle layer: Your transparent brand frame overlay.
- Top layer: Your logo and the article title.
The logic here is simple but effective. You are essentially building a composite image in real-time, matching dimensions perfectly every single time.
5. The Social Media "Squeeze" (Output)
Finally, the workflow spits out two files. One is your big, beautiful header. The other is the OG image, which is tightly cropped to 1200x630. This ensures that when you drop that link on X or LinkedIn, it does not get that weird, accidental crop that cuts off your logo. It is a small detail that makes you look like a pro.
Is it actually production-ready?
Almost. To make this a "hands-off" system, you will want to swap the manual trigger for a Webhook. That way, the second you hit "Save" in your CMS, the images are already being born in the background. It is a bit of a faff to set up the first time, I will admit, but once it is running? It is pure magic. I believe this is the future of lean content teams.
Look, at the end of the day, we are all just trying to reclaim our time without sacrificing the quality of what we put out into the world. Setting up a workflow like this might feel like a bit of a project initially, but the payoff is massive. You are not just automating a task; you are essentially hiring a digital design assistant that never sleeps, never gets "creative block," and perfectly understands your brand guidelines every single time.
Stop fighting with Canva templates and start letting your tools do the heavy lifting. Your future self, the one who is not stressed out at 10 PM on a Tuesday trying to resize a logo for the fifth time, will definitely thank you. It is time to let the machines handle the pixels so you can get back to the big ideas.
If you can't be bothered building it yourself you can download the template from the link above.